Showing posts with label love life. Show all posts

Tuesday, September 8, 2015

Anniversary Invite!

This has been kicking around on my phone for long enough that it's time to post about it! I was approached back in April/May to create an anniversary invitation that resembled a wedding invitation. The pattern for the folio is available on PInterest.


This is the dimensional photo I took for my Instagram feed. It shows that I lifted up the different shells to give them more dimension, and the only photo where I tied the invite shut with ribbon from Michaels which matched my theme perfectly. I was going for shells and beach as requested. 


This is the inside - going with the sandy beach theme, I used Desert Sand and Crystal Blue type colors with a slightly darker brown from Michaels. The reason for the RSVP being such a small white rectangle is that I originally messed up something I had stamped on it but it meant that having the shells embossed as a mat against it, turned it into something spectacular. 

See mistakes are worth it sometimes. 
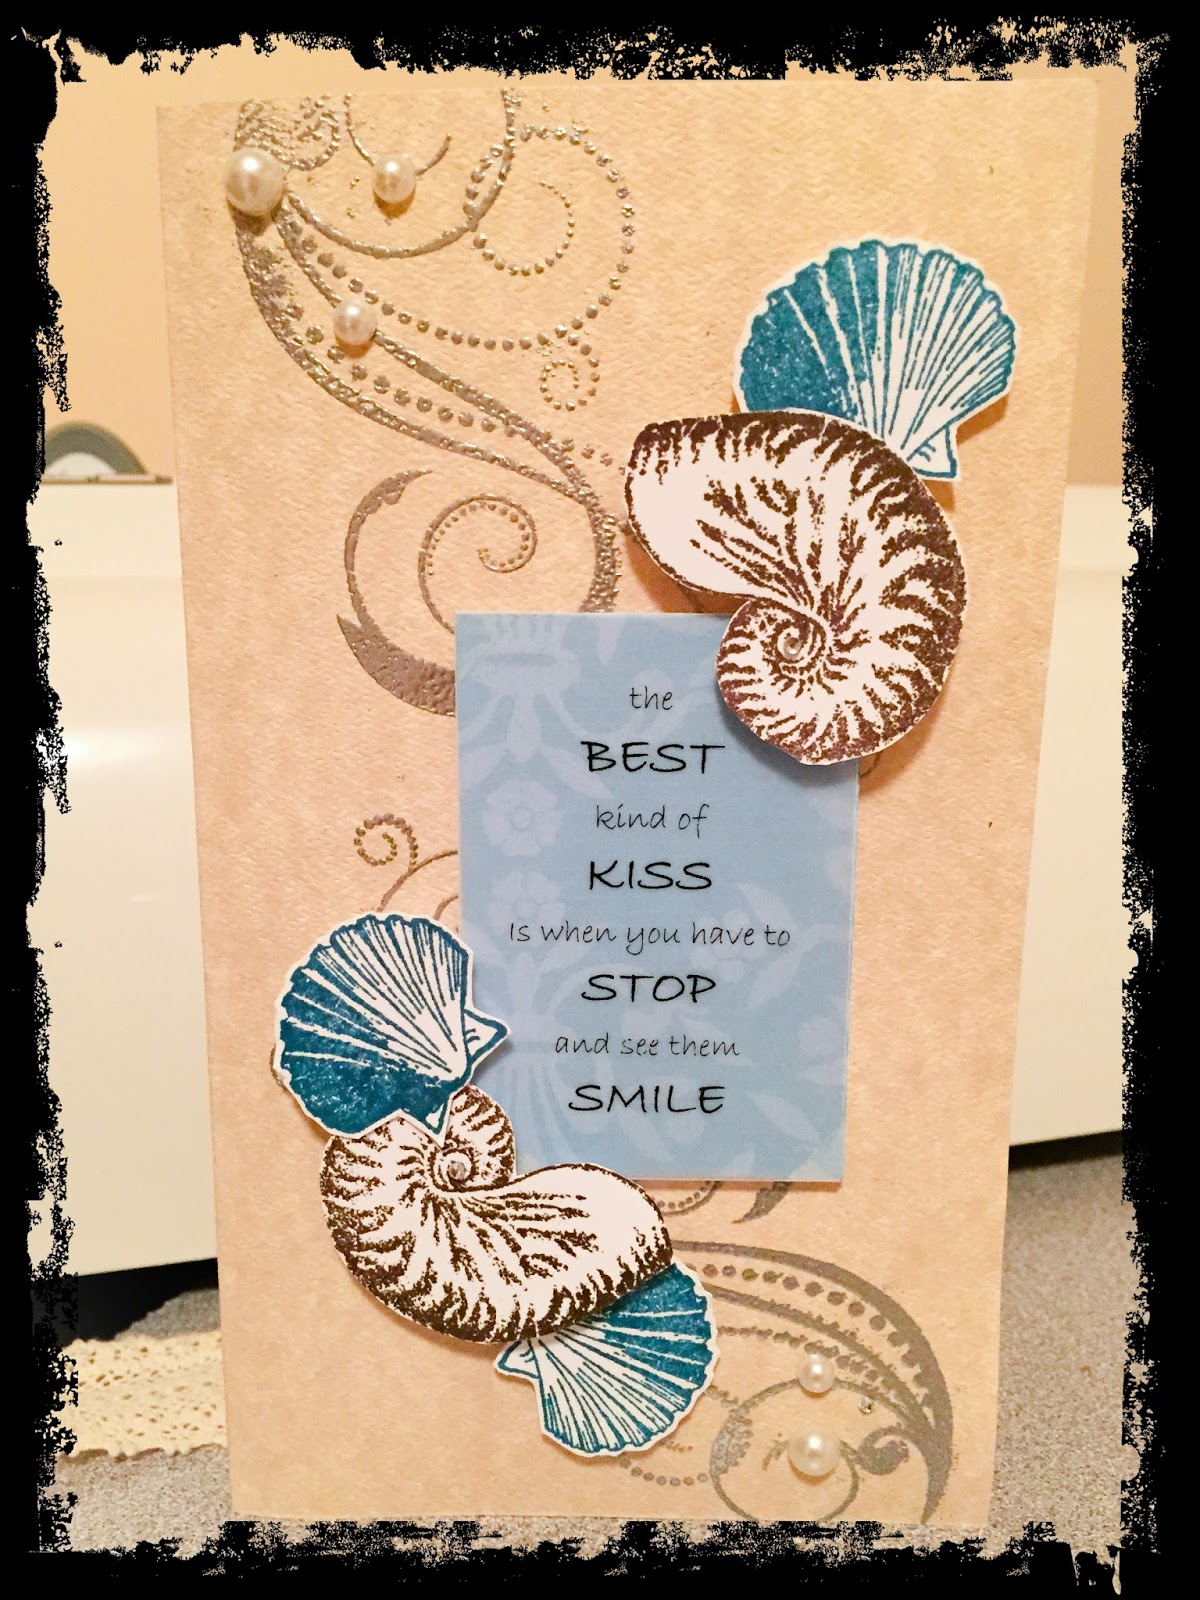


Here is the outside of the folio, closed up but ribbon untied. The blue shell is a Michaels stamp and the brown shell is from CTMH : Quick Cards - Shell (retired), which is the same one I used for the inside and masked all the text on the stamp so it wouldn't show up. And the swirls are from Love Life (retired).

Finally, I finished it off with a bunch of pearls.

The sentiment, if you're wondering is something I found online to go with the invite, printed it off on vellum paper and trimmed it. Then I used vellum tape and hid the visible squares under the shells.

Monday, January 5, 2015

Sometimes you just see a card...

... and you just gotta make it. This one from ScrappieToo that I found on CaseStudyChallenge was so adorable I couldn't pass it up, and it was perfect for a new baby card.

Today's inspiration: http://scrappietoo.blogspot.ca/2014/09/create-smile-september-bloghop.html : Angie Curvers, the very first image in the post.


The littlest critters from Cuddly Salutations was just perfect to be playing in the windows I had cut on the top. However, it wasn't easy to cut them and I wound up having to do it 3 times before I thought it was done right. My trick? Cut out three squares, place them and use a pencil to draw guiding lines on the cardstock. Then use an X-acto knife to cut into the middle, then use your scissors and cut along the lines. The critters themselves and accompanying bubbles were colored with Copic markers.


I decided to bring the pattern papers to the inside of the card as they feature in the background of each window, and used a black gel ink pen (fine Sharpie works too!) to draw the lines.

Other:
* White cardstock
* Black gel ink pen
* Copic markers

CTMH:
* Love Life Set
* Little Reminder Set (retired)
* Cuddly Salutations - Hostess Rewards set
* Barn Red Ink
* Outdoor Denim Ink
* Twilight Ink

As it's the new year and I have some exciting news for you... that's coming in the next post!

Tuesday, July 22, 2014

Baby's One Year Party...

I was flipping through cards on PInterest when this particular technique of having text on cardstock resisting ink came across my eye. Then I just had to do it.

Today's Inspiration: http://myscrapbasket.blogspot.fr/2014/05/color-q-challenge-240-and-simon-says.html


To get the funky pattern on the smaller unicorn, I first inked the stamp, then used one of CTMH's embossing folios and stamped right on it to get a fancy pattern. Just stumbled upon this unique technique that was inspired by the "kissing stamp" techniques.


Other
* Cream Cardstock

CTMH:
* Stella Level 2 Paper Pack
* Unicorn Dreams
* Love Life
* Joyful Birthday
* Gypsy Ink
* Tulip Ink
* Amethyst Ink
* Cotton Candy Ink
* Blush Ink
* Smoothie Ink
* Clear Detail Embossing Powder

Hope you are enjoying summer! I have a few more cards that I have yet to post.

Saturday, April 12, 2014

Because I didn't learn from years past...

... I am once again doing wedding-based invitations. This time, to a banquet after the actual event in Lake Tahoe. 5 years ago, I did my own invitations and literally burned right out on that; interlocking hearts cut out with Creative Memories punches, brads, vellum, silver ink, and I think I did about 110 of them with both events (Denmark wedding and Canada banquet) together.

Dad was talking about ordering these ol' fangled things off the interwebs. He wanted traditionalist Chinese, he said, but then he realized they cost an arm and a leg. Just like anything wedding related in North America. So, I volunteered. It was based off an old Chinese style wedding invitation from cousins married many years ago, and with some fiddling, came up with this.


The hardest part was being limited in the colors I could use, plus the audience I had to impress - namely, my old-fashioned Dad. Red of course goes without saying, but got permission to use silver in place of gold. You can't see it in the photo, but there are three shades of red here. The gears are a nod to my brother's career - he's an engineer.

I will find out what the inside looks like tomorrow with the wording my parents are going to provide, but this not only got a thumbs up - even the wedding couple was thrilled.

Other:
* Red cardstock
* Cuttlebug machine
* Cricut machine

CTMH:
* Damask Embossing Folder
* Artiste cartridge
* Corner Rounder
* Love Life stamp set
* Kanji Phrases set (retired)
* Silver embossing powder (retired)
* Bitty Adhesive Rhinestones

Now to make 34 more of these...

Monday, October 14, 2013

Fall Babies!!

At the office, my manager is expecting with his wife a new child any day now. This is their second but will be a sibling to their first. So, one of the ladies said we should come up with a baby gift for my manager as well as a card. [update: they gave birth to a beautiful baby boy mid-September]

You know how I feel about Hallmark cards. They're great, but for all the years I've made my own, I just don't feel they're personable enough. Plus I'm getting a reputation for making amazing cards at the office. As I don't have a proper baby welcome set it's always a creative feat to make them.

Today's inspiration is Case Study Challenge 156 : Tasnim Ahmed

I was looking for a simpler card due to time restraints for getting up early the following day and Tasnim's card was so pretty. I popped up the two chicks and dressed up the swirlies. As 156 is all about coloring, the chicks got colored!!


On the inside, I brought the swirls in and added a few hearts.


Michaels:
* White cardstock
* Copics Y11, Y21, Y13, R22, R29, R20, YG63, YG67, BG72, BG75, B24, B21

CTMH:
* Love Life
* Easter Wishes
* Blue and Green Adhesive Sparkles

Nothing like a rainy day for cheery cards!

Wednesday, March 27, 2013

When you don't have time...

... you make the time.

I'm still trying to get my Easter project for my office completed by tomorrow morning. So my pre-cut 3-D shape pieces, paper trimmer, and glue gun have been living under my desk for the last four hours in hopes that I will be gluing it all together during the lunch hour.

Today's card was inspired some time ago by Random Acts of Creativity but I can't remember the exact card.


Happy birthday to my father-in-law! I admit sheepishly that yes, today is his birthday and I haven't yet sent the card, but he snowbirds in South Africa over the winter months so I still have to find out where to send it to. I pulled out some random embellishments from CTMH that I have been saving for a little while and cut out a shape from Art Philosophy's cart in different sizes for the top of the card. I distressed the edges of the sentiment in Olive and created a bowtie by tying a knot in CTMH ribbon and then cutting the ends.


I brought in the stamping under the bowtie to the inside of this card as well. Can you recognize the paper? If you guessed Stella, you're right - I would have never thought to use Stella in a male card.

Other:
* Solid cardstock

CTMH:
* Ribbon
* Stella Level 2 Paper Pack (retired)
* Dreamin Level 2 Paper Pack (retired)
* Opaque Pearl Adhesives, Mocha
* Random CTMH embellishment
* Art Philosophy Cricut Cartridge
* You and Me (retired)
* Love Life
* Olive Ink
* Chocolate Ink

Happy Easter everyone! With luck I'll be able to get the Easter project up in the next few days.

Thursday, February 14, 2013

As always...

... it's Valentine's Day around the corner as well as my Dad's upcoming birthday.

So, I had to put together a Valentine's card for the husband who supports all my cardmaking and other random hobbies. And he does love my cards :)

Today's inspiration: http://www.ewenstyle.com/2013/01/case-study-valentine.html


This was the perfect opportunity to use the Jan 2013 stamp of the month which is a beautiful set of roses. It is just asking to be colored with the Copic markers that I have been slowly collecting over time: R22, R24, R29, YG67, YG63, BG75.


When you color with Copics, you do run the risk of running your ink as they are alcohol based markers. You should either stamp with pigment inks and let them dry, or emboss your image as I decided to do with black embossing powder.

Other:
* Solid cardstock
* Copic markers
* Ribbon

CTMH:
* Happy Valentine's - January 2013 SOTM
* Love Life
* Black embossing powder
* La Belle Vie Level 2 Paper Pack
* Red/Pink Sparkles

Happy Valentine's Day everyone - hope you find love in everything you do today.

Sunday, January 27, 2013

Love of Travel

I thought I'd crack into some of the paper packs that I have purchased and saved for the right occasion. CTMH tends to retire papers now and again but I always grab a few packs from the current line and use them much later on.

Today's inspiration is another Random Acts of Creativity piece, Sketchbook Saturday Challenge #48.


I wanted to incorporate a bit of heat embossing and a travel theme into this piece. One of my brother's favorite things to do is travel alongside rock climbing and diving and what better than to add a suitcase with a compass on it?


I finished the inside with flourishes from Love Life and I brought the same cardstock patterns inside by way of four little squares, distressed in two different shades of brown - my trusty Chocolate and then Cocoa to darken it a bit more. This turned into a two tone distress which looked really cool.

Wonder how I got those fancy lines on? A ruler and a Sharpie marker!

My Stash:
* Solid color cardstock
* Gold button
* Sharpie

CTMH:
* Love Life
* Just a Number
* Ruler
* Black Embossing Powder
* Blue and Green Adhesive Sparkles
* Mocha Opaque Pearls
* Avonlea Paper Pack Lvl 2 (retired)
* Chocolate Ink
* Cocoa Ink
* Black Ink
* Twilight Ink
* Garden Green Ink

And like that January is out the door and Feburary arrives - with a new catalogue!

Sunday, January 13, 2013

And the birthdays start again...

With both my brothers having birthdays in January I had to break out all my crafts again, even though they were all put away for the holidays.

However a swift inspiration kick in the back is always welcome and the new Spring/Summer catalogs arrived! They will debut Feb 1st but I will include one new catalog with any order in January.

My inspiration for today had to include planes, as my brother-in-law was once a pilot and still adores them : Mojo Monday : MOJO275


I thought I'd let the paper from Dreamin Level 2 (retired) carry the oomph of this card as it is so beautiful. However I was needing a distress tool and as it turns out, my foot file did the trick. Mind you I think I'll have to include the distress files in my next order. It exposes the white core that is at the center of all CTMH papers for a nice look.


I carried the paper and distressing through to the inside of the card and added a few flourishes, including distressing the middle panel's edges with Pacifica.

My Stash:
* Solid color cardstock
* Blue flower rhinestones

CTMH:
* Dreamin Level 2 Paper Pack
* Horizon
* Just A Number
* Love Life
* Olive Ink
* Pacifica Ink

Finally I should mention the stamp of the month for January - Happy Valentine's before it's too late - it's a beautiful set of roses that would work wonders on any layout or card.


This set is only 5$ with a minimum order of $50 CAD and don't forget about the latest promotion - a Valentine's Day kit for $10 with a minimum purchase of $35.00. 

Stay warm, it's cold outside!