.. I can't remember what the inspiration was, but I can definetly say a lot of the stamps and card stock were from the previous catalog. These were birthday cards that were for my brother and sister in law.
First card - for my sweet sister in law in CA!! I couldn't imagine adding a sweeter person to the large family of siblings I am part of either by blood or by marriage.
Only because I spent so much time with the Give A Lift stamp set and La Belle Vie is my favorite paper pack of all time is why I still know the name of the set! I used a plain paintbrush (dollar stores or your local craft stores will carry these) and a bunch of CTMH water based ink pads. Coloring with the pigment inks gives you a deeper color and it's easier to paint with.
Whoops, looks like I never quite took this photo in the correct orientation! I brought a strip of the same patterned cardstock inside and added some floral flourishes.
Second Card - for my little bro in CA. With the deep freeze that shows up from time to time, he was the smarter one and moved down to where it was warmer!
Another set that I spent a lot of time with for my Spring 2014 workshop - Robot Family with Timber Level 2 Paper Pack! I love these little robots and what's even better; husband loves robots, so I will be using this set over and over again :) and even better - the gears are from the Artiste CTMH Cricut cartridge! I can't get enough of how much I love CTMH and how it's held up so well over the years.
Gears are from the same stamp set - they're super cool! And how cheesy is the sentiment? I just had to use it - my little brother is an engineer so totally relevant. And P.S - the red gears were left over from the cuts I did originally for his wedding banquet invites. Waste not, want not.
Are you gearing up for Xmas yet? I certainly am!
Showing posts with label card-birthday. Show all posts
Thursday, December 4, 2014
Saturday, November 22, 2014
A musician's birthday...
... a friend of mine also happens to play off and on at Cafe Koi, and on occasion when he shows up with his instrument I keep wondering what really is in that body-sized instrument case. Thankfully he's a good guy or I'd really wonder.
It is about 3 weeks late, but as always I do need to include a vacation photo - we got back from sunny Cancun and miss the sun and warmth already.
So, I saw the Delightful Ditty set in the catalog and just had to pick it up for his birthday card. The inspiration is here: http://heartshugsandflowers.blogspot.ca/2014/09/a-new-challenge.html by Sending Hugs.
I was fiddling with a technique that's actually published in the catalogue - by using any acrylix block, inks, sponge daubers and one of their spray pens / water, I got a really cool distressed look for the violin. I suppose I could pretend they're bass instruments...
Then on the inside, I decided I'd continue the use of the same sponge daubers (12 pack is really worth it!) and got a cool multi-colored violin and sentiment. There is a lot more control over the inks and where they are on the stamp with the daubers, but you do have to work fast.
Other:
* Solid Cardstock
* Embossing Ink
CTMH:
* Delightful Ditty set
* Give A Lift set *retired
* Joyful Birthday set
* Autumn Terracotta Ink
* Ponderosa Pine Ink
* Outdoor Denim Ink
* Sponge Daubers
* Spray Pens
* Blue and Green Adhesive Sparkles *retired
* Metallic Sentiment *retired
And just like that, November is nearly over. I can't wait for the workshop coming up tomorrow!
It is about 3 weeks late, but as always I do need to include a vacation photo - we got back from sunny Cancun and miss the sun and warmth already.
One of the pools in the tranquil morning before the liquor and games hit.
So, I saw the Delightful Ditty set in the catalog and just had to pick it up for his birthday card. The inspiration is here: http://heartshugsandflowers.blogspot.ca/2014/09/a-new-challenge.html by Sending Hugs.
I was fiddling with a technique that's actually published in the catalogue - by using any acrylix block, inks, sponge daubers and one of their spray pens / water, I got a really cool distressed look for the violin. I suppose I could pretend they're bass instruments...
Then on the inside, I decided I'd continue the use of the same sponge daubers (12 pack is really worth it!) and got a cool multi-colored violin and sentiment. There is a lot more control over the inks and where they are on the stamp with the daubers, but you do have to work fast.
Other:
* Solid Cardstock
* Embossing Ink
CTMH:
* Delightful Ditty set
* Give A Lift set *retired
* Joyful Birthday set
* Autumn Terracotta Ink
* Ponderosa Pine Ink
* Outdoor Denim Ink
* Sponge Daubers
* Spray Pens
* Blue and Green Adhesive Sparkles *retired
* Metallic Sentiment *retired
And just like that, November is nearly over. I can't wait for the workshop coming up tomorrow!
Wednesday, September 24, 2014
Not enough boy stamps...
I know I complain about this every time I need to do a masculine card, but it's true. However, I had a bunch of lanterns and decided I'd do some more fiddling. I don't even remember what inspiration I was using anymore, but I wound up pretty far off the mark.
I used two different layers of foam tape and a whole lotta bling. I also saw Illuminate - an older SOTM and I thought that would be perfect. And finally I embossed the sentiment on the front.
I used second generation stamping on the bottom with one of the my favorite lanterns from the set plus brought in a little border off the top of one of the 12x12 patterns from Skylark.
Other:
* Cream Cardstock
* Embossing Ink
CTMH:
* Illuminate Stamp Set - retired SOTM
* Joyful Birthday Stamp Set
* You are my Happy Stamp Set - retired CC
* Skylark Level 2 Paper Pack
* Outdoor Denim Ink
* Ponderosa Pine Ink
* Blue and Green Adhesive Sparkles
* Black embossing powder - retired
We are slowly bidding farewell to the last bits of summer, hope you are enjoying it as much as I am before winter snows set in.
I used two different layers of foam tape and a whole lotta bling. I also saw Illuminate - an older SOTM and I thought that would be perfect. And finally I embossed the sentiment on the front.
I used second generation stamping on the bottom with one of the my favorite lanterns from the set plus brought in a little border off the top of one of the 12x12 patterns from Skylark.
Other:
* Cream Cardstock
* Embossing Ink
CTMH:
* Illuminate Stamp Set - retired SOTM
* Joyful Birthday Stamp Set
* You are my Happy Stamp Set - retired CC
* Skylark Level 2 Paper Pack
* Outdoor Denim Ink
* Ponderosa Pine Ink
* Blue and Green Adhesive Sparkles
* Black embossing powder - retired
We are slowly bidding farewell to the last bits of summer, hope you are enjoying it as much as I am before winter snows set in.
Wednesday, September 17, 2014
You know you're a bit too OCD when...
... you wind up redoing the front of the card not once, twice, but three times! I was trying to do a pretty hexagonal pattern and failed badly on the first try as my hexagons were too big; the second try I wanted to add outlines but my ruler skills were not up to par. But, third time was the charm!
Inspiration : https://www.flickr.com/photos/tulip1312/9315856351/lightbox/ by Joy Taylor @ SimpleByDesign
Instead of following a mostly white on white tone, I opted to pick three flirty fun colors to stamp the different hexagons in. I also utilized a swipe technique - first you ink the stamp, and then you swipe to get a pattern, which you can see on all the hexagons stamped in Gypsy.
And then, I got inspired by a link that teaches you how to make your own epoxy embellishments - and covered the butterfly cutout all over with Liquid Glass. I fiddled with the front of the card for so long that my Liquid Glass dried by the time I was done.
I brought the hexagons back inside the card and picked a cute little sentiment for it. I'm sure Mom's going to love this - and for the second time this year, the card is *actually* on time.
Other:
* Cream cardstock
CTMH:
* Honeycomb Stamp Set
* Joyful Birthday Stamp Set
* You Are My Happy Sentiment - retired CC
* Cocoa Ink
* Twilight Ink
* Ruby Ink
* Gypsy Ink
* Liquid Glass
* Opaque Pearl Adhesives - retired
* Red / Pink Adhesive Sparkles - retired
* Artiste Cricut Cartridge
Looks like the snow has retreated this week but the damage that it has caused is unreal!
Inspiration : https://www.flickr.com/photos/tulip1312/9315856351/lightbox/ by Joy Taylor @ SimpleByDesign
Instead of following a mostly white on white tone, I opted to pick three flirty fun colors to stamp the different hexagons in. I also utilized a swipe technique - first you ink the stamp, and then you swipe to get a pattern, which you can see on all the hexagons stamped in Gypsy.
And then, I got inspired by a link that teaches you how to make your own epoxy embellishments - and covered the butterfly cutout all over with Liquid Glass. I fiddled with the front of the card for so long that my Liquid Glass dried by the time I was done.
I brought the hexagons back inside the card and picked a cute little sentiment for it. I'm sure Mom's going to love this - and for the second time this year, the card is *actually* on time.
Other:
* Cream cardstock
CTMH:
* Honeycomb Stamp Set
* Joyful Birthday Stamp Set
* You Are My Happy Sentiment - retired CC
* Cocoa Ink
* Twilight Ink
* Ruby Ink
* Gypsy Ink
* Liquid Glass
* Opaque Pearl Adhesives - retired
* Red / Pink Adhesive Sparkles - retired
* Artiste Cricut Cartridge
Looks like the snow has retreated this week but the damage that it has caused is unreal!
Thursday, September 11, 2014
Sometimes it's just plain fun to fiddle.
It's time consuming, don't get me wrong, but I really loved the end result. This year is my MIL's big 60th birthday, but alas I had to go back to Calgary for work and so could not join her. Hubby, however is able to make a tiny detour so I'm glad for that, and I'm sending some cards with him.
It was a big set of cards to do in four days but I did it! There was no particular inspiration for this one but three hours of fiddling later...
I really love the silver frame on the black. It's downright gorgeous - and just that little extra sparkle here and there plus some foam tape and fussy cuts makes it really pretty. And ok, kudos to you if you can spot the distressing of three colors on the front!
The inside was the same butterfly - because you know, I absolutely adore this set which pairs perfectly with La Belle Vie Level 2 Paper Pack. I cried the day they retired it...
Other:
* Cream Cardstock
* Butterfly punch
* Lace edge punch
CTMH:
* La Belle Vie Level 2 Paper Pack
* Jardin Stamp Set - retired
* You Are My Happy Sentiments - retired
* Smokey Plum Ink
* Gypsy Ink
* Cotton Candy Ink
* Silver embossing powder - retired
* Detail embossing powder - retired
In the last three days, Old Man Winter decided to visit with a vengance and we had broken trees, power outs, dicey roads... I hope that it hasn't affected you too much and that you are warm, safe, and dry!
It was a big set of cards to do in four days but I did it! There was no particular inspiration for this one but three hours of fiddling later...
I really love the silver frame on the black. It's downright gorgeous - and just that little extra sparkle here and there plus some foam tape and fussy cuts makes it really pretty. And ok, kudos to you if you can spot the distressing of three colors on the front!
The inside was the same butterfly - because you know, I absolutely adore this set which pairs perfectly with La Belle Vie Level 2 Paper Pack. I cried the day they retired it...
Other:
* Cream Cardstock
* Butterfly punch
* Lace edge punch
CTMH:
* La Belle Vie Level 2 Paper Pack
* Jardin Stamp Set - retired
* You Are My Happy Sentiments - retired
* Smokey Plum Ink
* Gypsy Ink
* Cotton Candy Ink
* Silver embossing powder - retired
* Detail embossing powder - retired
In the last three days, Old Man Winter decided to visit with a vengance and we had broken trees, power outs, dicey roads... I hope that it hasn't affected you too much and that you are warm, safe, and dry!
Sunday, August 31, 2014
Late night card fun
I originally knew where the pin was for this but apparently when it's that late I don't pin it to my own board! Eek! If you see something similar, let me know. One of my most favorite things about handmade cards is that once you build up a good working stash of inks, stamps, and papers - you can tailor any card you make to the personality of the recipient.
Dusting off another old SOTM, Sweet Life - I decided to use fruits and stick to a blue schematic. She loves cooking and farmer's markets / fruits is totally up her alley. And, blue is her favorite color. I had thought about Copics for coloring, but with the way the stamp turned out, I felt that a more "watercolor" type of coloring would be a better choice. So I picked up a standard tiny paintbrush and the little pigment inks and started painting.
I brought the apple off the twigs out front to the inside of the card and accentuated that with a strip of the pattern I used on the front. I love matching the inside to the front of the card.
Other:
* Cream cardstock
* Paintbrush
CTMH:
* A Sweet Life Stamp Set - retired SOTM
* Joyful Birthday
* Outdoor Denim Ink
* Sweet Leaf pigment Ink : Whimsy
* Cranberry pigment Ink : Adventure
* Saddle pigment Ink : Basics
* Hollyhock pigment Ink : Adventure
* Foam Adhesive
* Blue / Green Adhesive Sparkles
* Itty Bitty Sparkles
* Skylark Level 2 Paper Pack
It's transitioning to fall too quickly for me!
Dusting off another old SOTM, Sweet Life - I decided to use fruits and stick to a blue schematic. She loves cooking and farmer's markets / fruits is totally up her alley. And, blue is her favorite color. I had thought about Copics for coloring, but with the way the stamp turned out, I felt that a more "watercolor" type of coloring would be a better choice. So I picked up a standard tiny paintbrush and the little pigment inks and started painting.
I brought the apple off the twigs out front to the inside of the card and accentuated that with a strip of the pattern I used on the front. I love matching the inside to the front of the card.
Other:
* Cream cardstock
* Paintbrush
CTMH:
* A Sweet Life Stamp Set - retired SOTM
* Joyful Birthday
* Outdoor Denim Ink
* Sweet Leaf pigment Ink : Whimsy
* Cranberry pigment Ink : Adventure
* Saddle pigment Ink : Basics
* Hollyhock pigment Ink : Adventure
* Foam Adhesive
* Blue / Green Adhesive Sparkles
* Itty Bitty Sparkles
* Skylark Level 2 Paper Pack
It's transitioning to fall too quickly for me!
Tuesday, August 26, 2014
First Class Birthday
I am back from a fabulous holiday in beautiful Malta, on the Mediterranean Coast. It was warm, the food was fantastic, the company was awesome, and I'm left wondering if I want to move or not :) If you do go and see one thing, go see Comino - the waters are just unreal but prepare for a large amount of tourists! And this photo is just from my iPhone... so you can imagine photos do not do this place justice.
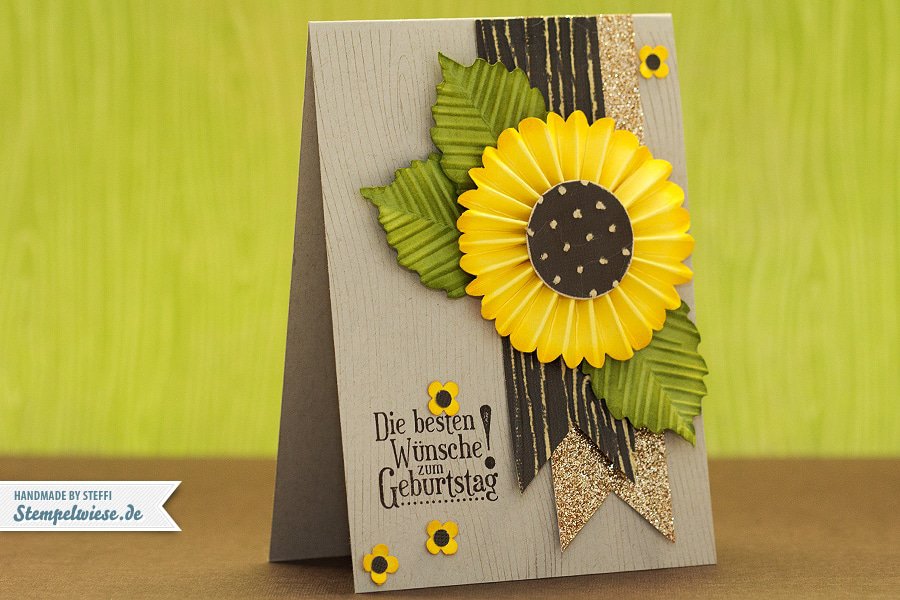
My brother in law is a huge fan of planes... which means, I use a specific set: Horizons over and over again. I'm hoping to expand my collection of plane stamp sets eventually. However, this time I had accidentally double ordered a set for a customer of mine that included a first class fun tag - just perfect for the same flight theme.
Inspiration: http://stempelwiese.de/wp-content/uploads/2012/10/geburtstagskarte-stampin-up-rosette-sonnenblume-031012.jpg
I hauled out an old set of the Level 2 Assortment from Lucky to finish this off. After all, doesn't everyone dream of flying first class one day? I wanted to play a bit more with distressing, so I crumpled up some paper towel and went to town with Barn Red, Autumn Terracotta and Outdoor Denim.
On the inside, I used one of the borders that you can cut off the 12 x 12 patterns from Skylark. Some left over goodies from my workshops that went awesome!
Other:
* Cream Cardstock
CTMH:
* True To Life Stamp Set
* You Are My Happy Sentiments Set - retired Constant Campaign
* Card Chatter Birthday Set - retired
* Horizon Set - retired
* Dreams Come True - retired
* Skylark Level 2 Paper Pack
* Barn Red Ink
* Outdoor Denim Ink
* Autumn Terracotta Ink
* Goldrush Ink
* Lucky Level 2 Chipboard Assortment
* Designer Ribbon Blue Collection - retired
* Blue / Green Epoxy Adhesive Bubbles
Where did the heat go?
Comino & Blue Lagoon - an island belonging to the Maltese Archipelago between the islands of Malta and Gozo in the Mediterranean Sea
My brother in law is a huge fan of planes... which means, I use a specific set: Horizons over and over again. I'm hoping to expand my collection of plane stamp sets eventually. However, this time I had accidentally double ordered a set for a customer of mine that included a first class fun tag - just perfect for the same flight theme.
Inspiration: http://stempelwiese.de/wp-content/uploads/2012/10/geburtstagskarte-stampin-up-rosette-sonnenblume-031012.jpg
I hauled out an old set of the Level 2 Assortment from Lucky to finish this off. After all, doesn't everyone dream of flying first class one day? I wanted to play a bit more with distressing, so I crumpled up some paper towel and went to town with Barn Red, Autumn Terracotta and Outdoor Denim.
On the inside, I used one of the borders that you can cut off the 12 x 12 patterns from Skylark. Some left over goodies from my workshops that went awesome!
Other:
* Cream Cardstock
CTMH:
* True To Life Stamp Set
* You Are My Happy Sentiments Set - retired Constant Campaign
* Card Chatter Birthday Set - retired
* Horizon Set - retired
* Dreams Come True - retired
* Skylark Level 2 Paper Pack
* Barn Red Ink
* Outdoor Denim Ink
* Autumn Terracotta Ink
* Goldrush Ink
* Lucky Level 2 Chipboard Assortment
* Designer Ribbon Blue Collection - retired
* Blue / Green Epoxy Adhesive Bubbles
Where did the heat go?
Sunday, August 3, 2014
Foxes and a little girl's birthday...
I admit it. I'm guilty of buying stamp sets that I fall in love with. Which means occasionally I have all these sets that I've never used just floating around somewhere. The Feburary 2014 SOTM was no exception. But, I finally found a use!
Inspiration: Case Study 157 : Jean Martin
On the front of the card is a scrap from La Belle Vie, a retired paper pack that I was sad to see go. It's French inspired and thought it would be super elegant for the little birthday girl. I just had to use the foxes - she's intelligent and very sassy :) when she's not scared of the people around her. I also popped up the flower on the bottom fox with puff tape and used a bit of bling to make it stand out.
On the inside is a quote from You Are My Happy, an older constant campaign (another set I didn't know what to do with until now!). I brought the fox inside along with a strip of the same paper from the front. I love being able to do that.
Other:
* Pink adhesive flower sparkle
CTMH:
* La Belle Vie Level 2 Paper Pack - retired
* You are My Happy Sentiments - retired
* Wild About Love - Feb 2014 CC - retired
* Card Chatter - Birthday - retired
* Bronze Shimmer Trim
* Gypsy Ink
* Smoothie Ink
* Twilight Ink
* Foam Adhesive
Hope you are enjoying the respite from the heat!
Inspiration: Case Study 157 : Jean Martin
On the front of the card is a scrap from La Belle Vie, a retired paper pack that I was sad to see go. It's French inspired and thought it would be super elegant for the little birthday girl. I just had to use the foxes - she's intelligent and very sassy :) when she's not scared of the people around her. I also popped up the flower on the bottom fox with puff tape and used a bit of bling to make it stand out.
On the inside is a quote from You Are My Happy, an older constant campaign (another set I didn't know what to do with until now!). I brought the fox inside along with a strip of the same paper from the front. I love being able to do that.
Other:
* Pink adhesive flower sparkle
CTMH:
* La Belle Vie Level 2 Paper Pack - retired
* You are My Happy Sentiments - retired
* Wild About Love - Feb 2014 CC - retired
* Card Chatter - Birthday - retired
* Bronze Shimmer Trim
* Gypsy Ink
* Smoothie Ink
* Twilight Ink
* Foam Adhesive
Hope you are enjoying the respite from the heat!
Saturday, June 21, 2014
Summer workshop!!
Wow, what a crazy life so far between work, gardening, and trying to get all my ducks in a row for a summer workshop that was requested by my ladies :) The running theme for these cards were all layouts from Sketchbook Saturday Challenges! What can I say, I'm a huge fan of Chupa's work and her layouts were fantastic.
This time, I also wanted to showcase some of the beautiful paper packs that CTMH has in their catalog. The three paper packs featured are Ivy Lane (girl birthday cards), Timberline (boy birthday cards), and Skylark (baby congratulation cards)
Card #1 - Girl Birthday
Inspiration: Sketchbook Saturday Challenge #80
This time, I also wanted to showcase some of the beautiful paper packs that CTMH has in their catalog. The three paper packs featured are Ivy Lane (girl birthday cards), Timberline (boy birthday cards), and Skylark (baby congratulation cards)
Card #1 - Girl Birthday
Inspiration: Sketchbook Saturday Challenge #80
Inks used: Smoothie, Cotton Candy, Gypsy
Stamp: Inspiration Flourishes, Dreamer
Card #2 - Girl Birthday
Inspiration: Sketchbook Saturday Challenge #67
Inks used: Gypsy, Cocoa
Stamp Set: Quick Cards - Island Greeting, Banner Wishes
Card #3 - Boy Birthday
Inspiration: Sketchbook Saturday Challenge #92
Inks Used: Twilight, Cocoa, Ponderosa Pine
Stamp Set: Robot Family
Card #4 : Boy Birthday
Inspiration: Sketchbook Saturday Challenge #59
Inks Used: Outdoor Denim
Stamp Set: Country-Born
Card #5: Baby Congratulations #1
Inspiration: Sketchbook Saturday Challenge #76
Inks Used: Goldrush, Autumn Teracotta, Ponderosa Pine,Cocoa
Stamp Set: Give a Lift, Banner Wishes
Card #6: Baby Congratulations
Inspiration: Sketchbook Saturday Challenge #67
Inks Used: Ruby, Cocoa, Whimsy Pigment Ink Set, Basic Pigment Ink Set
Stamp Set: Buggy Love, Give a Lift
My go-to accessory is foam tape above everything else. What`s your go-to accessory for card making or scrapbooking?
The workshop dates are
- Sunday, June 29th
- Saturday, July 26th.
Cards are priced at $2.00 each and come with envelopes. As well, I can also create card kits with pre-stamped pieces for the same price per card. Finally, cards assembled from previous workshops are also available for sale at the Summer 2014 workshop for $3.00 each.
Hope you are enjoying the sunshine!
Sunday, March 2, 2014
Working on the backlog...
this time I was working on Dad's birthday card only half a month late. I hate it when work gets in the way. I originally saw this while digging through PInterest, and it was only a matter of time before I decided it was worth doing.
I`m pretty tired these days so classy and simple is my favorite style lately. Today`s inspiration : http://www.mamamostamps.com/2013/08/case-study-3rd-anniversary-blog-hop.html by Maureen Merritt.
I just realized I forgot to add fancy borders on these photos... oh well, guess that is for next time. I went through my scrap heap and pulled out the funky little pigment cube sets to use on these stamps. I also brought back Enjoy Life`s clock and added a few embellishments.
And of course, I couldn`t resist using the bicycle once again teamed with some fancy yellow swirls and the same colors into the inside.
Other:
* Solid cardstock
* Orange patterned cardstock
CTMH:
* Enjoy Life (retired)
* Just A Number (retired)
* Saddle Pigment cube from Basic set
* Buttercup Pigment cube from Whimsy set
* Twilight Pigment cube from Whimsy set
* Avalon Level 2 Paper Pack (retired)
* Dreamin`Level 2 Paper Pack (retired)
* Mocha Adhesive Pearls (retired)
* Blue and Green Adhesive Rhinestones (retired)
What a crazy set of ridiculously cold days, hope you are staying warm!
I`m pretty tired these days so classy and simple is my favorite style lately. Today`s inspiration : http://www.mamamostamps.com/2013/08/case-study-3rd-anniversary-blog-hop.html by Maureen Merritt.
I just realized I forgot to add fancy borders on these photos... oh well, guess that is for next time. I went through my scrap heap and pulled out the funky little pigment cube sets to use on these stamps. I also brought back Enjoy Life`s clock and added a few embellishments.
And of course, I couldn`t resist using the bicycle once again teamed with some fancy yellow swirls and the same colors into the inside.
Other:
* Solid cardstock
* Orange patterned cardstock
CTMH:
* Enjoy Life (retired)
* Just A Number (retired)
* Saddle Pigment cube from Basic set
* Buttercup Pigment cube from Whimsy set
* Twilight Pigment cube from Whimsy set
* Avalon Level 2 Paper Pack (retired)
* Dreamin`Level 2 Paper Pack (retired)
* Mocha Adhesive Pearls (retired)
* Blue and Green Adhesive Rhinestones (retired)
What a crazy set of ridiculously cold days, hope you are staying warm!
Subscribe to:
Posts (Atom)