Showing posts with label bohemian alphabet. Show all posts

Saturday, February 8, 2014

I'm still backlogged...

... on cards!! Booting off to South Africa in the first week of December meant that I was behind in making Christmas cards, and my parents collect them. So I feel terrible that they didn't get one this year, and so I'm making it for them now, albeit a bit late.

I dusted off some old stamp sets that I hadn't used in some time and are retired, and had great fun with the alphabets.

Today's inspiration: My Paper Secret Friendship Card [Wonderful Words, Friends], by Christina

 
The biggest challenge was lining up the letters correctly for the sentiment on the red line of the cardstock. I used red, green and white for Xmas colors. Some years back, I fell in love with the Bohemian alphabet and bought it on a whim. I haven't used it much since, but it was appropriate for this card. On retrospect it could almost be a baby card, but it's a Christmas card. The reindeer was colored with Copic Markers.


I continued the three stripe colors inside the card and stamped the sentiment inside with Cranberry Ink. The fun thing about doing Xmas cards that isn't for a workshop is that I can revisit with all my stamp sets whether or not they're retired. I colored the little raccoon again with Copic markers.

Other:
* Solid Cardstock
* Copic Markers

CTMH:
* Bundled Buddies, retired
* Snow Flurries, retired
* Classmate Alphabet
* Bohemian Alphabet, retired
* White Daisy Ink
* Cranberry Ink
* Grey Flannel Ink, retired

It's been pretty chilly here the last few days, hope you are all staying warm!

Saturday, January 28, 2012

Masculine colors...

My father in law is turning 60 this year, and his gift to himself is to fly all the siblings plus any significant others to Portugal from Denmark. So all we need to do is get to Denmark and he'll take care of the rest. Our tickets are bought; and just counting down the months before we go.

A 60th birthday deserves an awesome card! As I was doing my usual trolling of the forums last night I came across two inspirational items and a card was born. This is the first time I am entering in two challenges.

Inspiration: Heart 2 Heart's Photo Inspired Challenge & i{heart}2stamp's January 2012 SFYTT


I changed up the layout slightly from the SFYTT because I didn't feel like doing a circle but also because the inspiration from H2H includes tags! From the picture I took the theme of browns, yellows, and the leaf branch which is present in the large brown background patterned photo. Since the colors aren't "girly", they're masculine, in my opinion.


The funniest problem I have with putting so much on a card is that it flops over if I don't design the inside of the card and add some more 'weight' to it. So, I continued the leaf theme - those leaves are actually cut out of scraps from the front pattern of the paper, and I distressed the edge of the sentiment piece with Chocolate because it blended too much into the yellow otherwise.

Michaels etc:
* Solid Cardstock, Spice Market Collection
* Yellow dotted pattern - Creative Memories
* Ribbons
* Leaf pattern cardstock - Costco

CTMH:
* Limited Edition - September 2011 SOTM
* Horizon
* Bohemian Alphabet
* Card Chatter - Birthday
* Chocolate Ink
* Spring Iris Ink
* Olive Ink
* Honey Ink
* Opaques Adhesive Gems (Pearls), Mocha

I'm looking forward to Portugal and seeing my Danish family soon!


Sunday, November 6, 2011

You and Me Themed 2012 Calendar

This was a unique challenge for me. I wanted to stay solely with the colors that were in the You and Me Kit: Creme Brulee, Olive, Smoothie, Garden Green, and Chocolate which meant that I did not have free reign with colors like I normally have. However, I didn't mind; it was actually less stressful to work with four colors (I did not end up purchasing the Creme Brulee ink) and it came out looking fantastic.


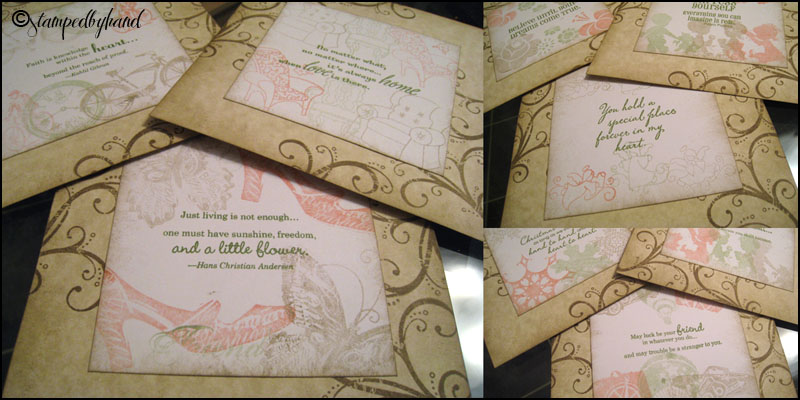
As you can see I ended up using You and Me patterned cardstock for the front and back only. The rest of the inside pages were the brownish/cream colored cardstock from Michael's Spice Market cardstock and the quote pages were white cardstock that I distressed with chocolate ink.


Each of the stamped corners on both sides were done with the curly stamp from You and Me, three times per corner and then all squares were distressed with chocolate ink. I thought it would be lovely to have a little quotation on the back of each square. Each quotation is matched with some "pictures" of course, all second generation stamping. In the case of September and December, the months actually span over six weeks so I needed to do some masking in order to stretch the weeks.

I wish I could keep this calendar for myself as it came out looking so gorgeous but it is a present that I'm sure my Mom will love this year for Christmas. I am glad that this project is done - I can finally put all my stuff away properly :) but no shortage of stamp sets were used.

All in all this being my first time, I will definetly use the My Creations chipboard items again. Next time I will be using their triangle banner.

Michaels:
* Cardstock from 'Spice Market' set

CTMH:
* You and Me Kit
* Creme Brulee, Smoothie, Olive, Garden Green cardstock from Autumn set
* Bohemian Alphabet
* Classmate Alphabet
* Month By Month
* Enjoy Life
* Find Your Style - Jan 2011 Stamp of the Month
* Horizons
* Chairs To You - April 2011 Stamp of the Month
* Pair-A-Phrase - August Constant Campaign
* Angel Sent
* Sensational Season - March 2011 Stamp of the Month
* Wings Workshop kit stamp - retired
* Dreams Come True
* Baby Love
* Snowflakes
* Wonderful Friend - retired
* Olive Ink
* Chocolate Ink
* Garden Green Ink
* Sorbet Ink

Saturday, September 10, 2011

Looking for that special project...

When I first started with CTMH back in May, my consultant's welcome package included the You and Me kit with a stamp set, die cuts, and paper. As this set was also being used to fundraise for all the catastrophes on the other side of the border in the US I was just waiting for that "special" project that I thought would be fitting.

I am now in the process of starting Christmas cards and some homemade Christmas presents. As it were, my Mom lives vicariously through me, as her mother was a crafty lady and she doesn't have the patience or head for it. I thought she'd like a homemade calendar; and then it came to me that this was the You and Me project I was waiting on. I have only gotten as far as the front cover.


I have to pick up a few more items to start the inside including a stamp block, possibly some paper from Michaels, and the Autumn paper pack from CTMH. I will be using the Month By Month stamp. When I am done I will post a sneak peek of the inside.

As well I did finish my Halloween project, but you will have to wait until October for panels 3-9. My cube will be the envy of my cubemates.

Cardstock:
* Michaels

CTMH:
* You and Me Kit (stamp set, die cuts, opaque adhesive pearls) - retired
* Bohemian Alphabet
* Love Petite Perks set - retired
* My Creations™ Display Album
* Chocolate Ink
* Smoothie Ink
* Olive Ink
* Garden Green Ink


Thursday, August 11, 2011

Decoration #2

In the spirit of Wicked, August's stamp of the month I came up with another cube decoration square. This time I decided to use two new elements of the set - the hat, and the kitty.


Pardon the poor lighting; the orange is the same as the first square.

I also love embossing things, and this time I thought I would try out the new embossing powders (black for Halloween) that I just picked up from CTMH. I have resisted it for a long time, because I own some silver, gold, and clear sparkly stuff from when my grandma was still alive. She was the most amazing crafter I have ever met, and I miss her - and she was always willing to indulge me in whatever craft obsession I had.

Amazing stuff, I tell you. The photo doesn't show it but I embossed the curly background on the bottom and the top left square with the black powder.

Cardstock
* Michael's Craft Store

Embossing ink from my own stash

CTMH
* Black embossing powder
* Corner Rounder
* Bohemian alphabet set
* You and Me set (June fundraiser)
* Wicked set
* Outdoor Denim Ink
* Cranberry Ink

Saturday, July 16, 2011

Fun Birthday Times

My husband's Grandmother is turning 80 and having a huge celebration in Denmark. She asked us to be there, but unfortunately we cannot go due to planning obstacles. So, instead I decided to make her a fun and feisty card. I think this is the loudest card I have ever done, but it also is supposed to show that when you're 80 you can do whatever you want.

Today's card is inspired by Got Sketch: Sketch 122

Here's my take on it:


Cardstock:
* Local finds

Tools:
* Provocraft Edging scissors
* CM Limited Edition Butterfly Pocket Punch (retired)
* Fiskars Border Punch

CTMH:
* Card Chatter
* Bohemian Alphabet
* You and Me
* Spring Iris Ink
* Tulip Ink

Remember, if you are a new follower (drop me a comment if you are!) or order this month you can enter to win one of four Petite Perks Love stamp.

Wednesday, June 15, 2011

I love circles.

To me anything but squares are a challenge. I can cut smaller circles with a Fiskars Shape cutter but anything large, like this particular layout requires some innovative thinking.

Today's inspiration for my wedding album (yes, a scrapbook several years in the making now) was Sketches In Thyme Thursday Takes #49.

Two dinner plates, one of them from my bone china collection plus a pencil equated to two almost-perfect circles of the right size.


You'll notice that I used two techniques here: masking and double-inking.

Cardstock:
* Local craft stores

Embellishments:
* Dollar store finds

CTMH
* You & Me (June fundraiser)
* Soul Mates (D1254)
* Smokey Plum Ink (2147)
* Chocolate Ink (Z2111)
* Sorbet Ink (Z2164)

Monday, May 23, 2011

Find Your Style Congratulations Card

A friend of mine has just finished her Masters degree, and I was invited to a celebratory BBQ. So I thought it fitting that I bring her a card, as well I decided to play for the very first time at Mojo Monday!

Today's inspiration is MOJO192

By the time I was done picking papers and colors, I realized this was going to be a girly rather than a more boy-style card.


As you can see, I decided to use a different stamping technique by first inking the entire stamp in Cranberry, then rolling the edges in Smokey Plum for a two-tone effect. Should you decide to try this, remember to pick the lighter ink first, then work with successively darker and darker inks.

Cardstock
* Local craft stores

Embellishments
* Dollar store finds

CTMH
* Find Your Style (Jan 2011 Stamp of the Month)
* Bohemian Alphabet
* Smokey Plum Ink
* Cranberry Ink
* Moonstruck Ink