I originally knew where the pin was for this but apparently when it's that late I don't pin it to my own board! Eek! If you see something similar, let me know. One of my most favorite things about handmade cards is that once you build up a good working stash of inks, stamps, and papers - you can tailor any card you make to the personality of the recipient.
Dusting off another old SOTM, Sweet Life - I decided to use fruits and stick to a blue schematic. She loves cooking and farmer's markets / fruits is totally up her alley. And, blue is her favorite color. I had thought about Copics for coloring, but with the way the stamp turned out, I felt that a more "watercolor" type of coloring would be a better choice. So I picked up a standard tiny paintbrush and the little pigment inks and started painting.
I brought the apple off the twigs out front to the inside of the card and accentuated that with a strip of the pattern I used on the front. I love matching the inside to the front of the card.
Other:
* Cream cardstock
* Paintbrush
CTMH:
* A Sweet Life Stamp Set - retired SOTM
* Joyful Birthday
* Outdoor Denim Ink
* Sweet Leaf pigment Ink : Whimsy
* Cranberry pigment Ink : Adventure
* Saddle pigment Ink : Basics
* Hollyhock pigment Ink : Adventure
* Foam Adhesive
* Blue / Green Adhesive Sparkles
* Itty Bitty Sparkles
* Skylark Level 2 Paper Pack
It's transitioning to fall too quickly for me!
Sunday, August 31, 2014
Tuesday, August 26, 2014
First Class Birthday
I am back from a fabulous holiday in beautiful Malta, on the Mediterranean Coast. It was warm, the food was fantastic, the company was awesome, and I'm left wondering if I want to move or not :) If you do go and see one thing, go see Comino - the waters are just unreal but prepare for a large amount of tourists! And this photo is just from my iPhone... so you can imagine photos do not do this place justice.
My brother in law is a huge fan of planes... which means, I use a specific set: Horizons over and over again. I'm hoping to expand my collection of plane stamp sets eventually. However, this time I had accidentally double ordered a set for a customer of mine that included a first class fun tag - just perfect for the same flight theme.
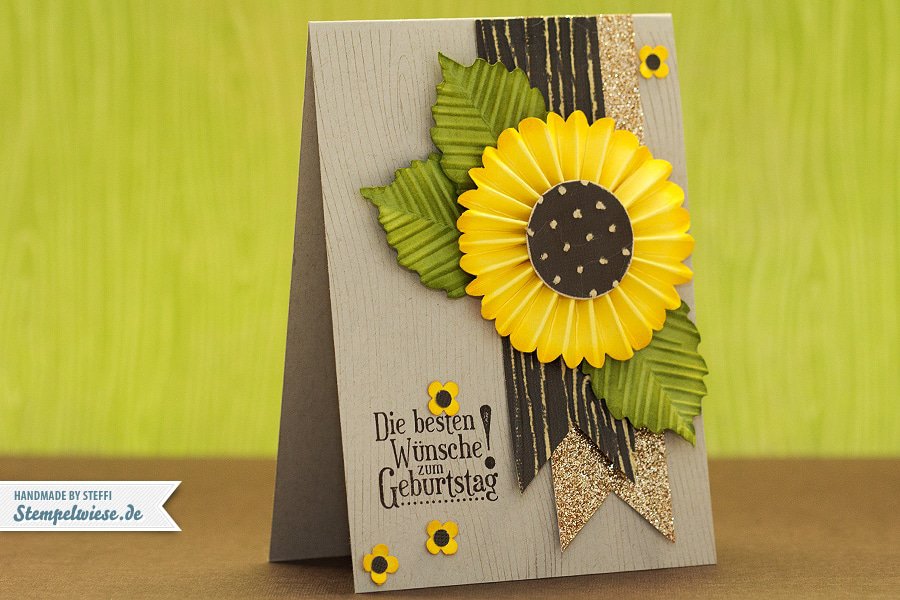
Inspiration: http://stempelwiese.de/wp-content/uploads/2012/10/geburtstagskarte-stampin-up-rosette-sonnenblume-031012.jpg
I hauled out an old set of the Level 2 Assortment from Lucky to finish this off. After all, doesn't everyone dream of flying first class one day? I wanted to play a bit more with distressing, so I crumpled up some paper towel and went to town with Barn Red, Autumn Terracotta and Outdoor Denim.
On the inside, I used one of the borders that you can cut off the 12 x 12 patterns from Skylark. Some left over goodies from my workshops that went awesome!
Other:
* Cream Cardstock
CTMH:
* True To Life Stamp Set
* You Are My Happy Sentiments Set - retired Constant Campaign
* Card Chatter Birthday Set - retired
* Horizon Set - retired
* Dreams Come True - retired
* Skylark Level 2 Paper Pack
* Barn Red Ink
* Outdoor Denim Ink
* Autumn Terracotta Ink
* Goldrush Ink
* Lucky Level 2 Chipboard Assortment
* Designer Ribbon Blue Collection - retired
* Blue / Green Epoxy Adhesive Bubbles
Where did the heat go?
Comino & Blue Lagoon - an island belonging to the Maltese Archipelago between the islands of Malta and Gozo in the Mediterranean Sea
My brother in law is a huge fan of planes... which means, I use a specific set: Horizons over and over again. I'm hoping to expand my collection of plane stamp sets eventually. However, this time I had accidentally double ordered a set for a customer of mine that included a first class fun tag - just perfect for the same flight theme.
Inspiration: http://stempelwiese.de/wp-content/uploads/2012/10/geburtstagskarte-stampin-up-rosette-sonnenblume-031012.jpg
I hauled out an old set of the Level 2 Assortment from Lucky to finish this off. After all, doesn't everyone dream of flying first class one day? I wanted to play a bit more with distressing, so I crumpled up some paper towel and went to town with Barn Red, Autumn Terracotta and Outdoor Denim.
On the inside, I used one of the borders that you can cut off the 12 x 12 patterns from Skylark. Some left over goodies from my workshops that went awesome!
Other:
* Cream Cardstock
CTMH:
* True To Life Stamp Set
* You Are My Happy Sentiments Set - retired Constant Campaign
* Card Chatter Birthday Set - retired
* Horizon Set - retired
* Dreams Come True - retired
* Skylark Level 2 Paper Pack
* Barn Red Ink
* Outdoor Denim Ink
* Autumn Terracotta Ink
* Goldrush Ink
* Lucky Level 2 Chipboard Assortment
* Designer Ribbon Blue Collection - retired
* Blue / Green Epoxy Adhesive Bubbles
Where did the heat go?
Sunday, August 3, 2014
Foxes and a little girl's birthday...
I admit it. I'm guilty of buying stamp sets that I fall in love with. Which means occasionally I have all these sets that I've never used just floating around somewhere. The Feburary 2014 SOTM was no exception. But, I finally found a use!
Inspiration: Case Study 157 : Jean Martin
On the front of the card is a scrap from La Belle Vie, a retired paper pack that I was sad to see go. It's French inspired and thought it would be super elegant for the little birthday girl. I just had to use the foxes - she's intelligent and very sassy :) when she's not scared of the people around her. I also popped up the flower on the bottom fox with puff tape and used a bit of bling to make it stand out.
On the inside is a quote from You Are My Happy, an older constant campaign (another set I didn't know what to do with until now!). I brought the fox inside along with a strip of the same paper from the front. I love being able to do that.
Other:
* Pink adhesive flower sparkle
CTMH:
* La Belle Vie Level 2 Paper Pack - retired
* You are My Happy Sentiments - retired
* Wild About Love - Feb 2014 CC - retired
* Card Chatter - Birthday - retired
* Bronze Shimmer Trim
* Gypsy Ink
* Smoothie Ink
* Twilight Ink
* Foam Adhesive
Hope you are enjoying the respite from the heat!
Inspiration: Case Study 157 : Jean Martin
On the front of the card is a scrap from La Belle Vie, a retired paper pack that I was sad to see go. It's French inspired and thought it would be super elegant for the little birthday girl. I just had to use the foxes - she's intelligent and very sassy :) when she's not scared of the people around her. I also popped up the flower on the bottom fox with puff tape and used a bit of bling to make it stand out.
On the inside is a quote from You Are My Happy, an older constant campaign (another set I didn't know what to do with until now!). I brought the fox inside along with a strip of the same paper from the front. I love being able to do that.
Other:
* Pink adhesive flower sparkle
CTMH:
* La Belle Vie Level 2 Paper Pack - retired
* You are My Happy Sentiments - retired
* Wild About Love - Feb 2014 CC - retired
* Card Chatter - Birthday - retired
* Bronze Shimmer Trim
* Gypsy Ink
* Smoothie Ink
* Twilight Ink
* Foam Adhesive
Hope you are enjoying the respite from the heat!
Wednesday, July 30, 2014
More wedding cards!!
What can I say, sometimes there's a lotta weddings and sometimes there is none. This time it was my little brother's wedding. He first got married in May in Lake Tahoe, Nevada, and then to honor my mother's wishes, a second 10 course Chinese banquet in Calgary.
Lake Tahoe was gorgeous and pictures just don't do it justice. The below image is of a "cheap" homemade centerpiece made by my brothers' friends, taken by JT Images. To be honest, I've seen a lot more expensive ones that were purchased, and weren't half as elegant or pretty.
Congratulations to my brother and my sister in law on their marriage, and I wish them many happy days to follow. Of course, you know this merited not one but two cards, as my in-laws wished to also send a gift. I couldn't ask for better inlaws. I can't remember the inspiration for either one, unfortunately, but if you recognize the layout - let me know!
Card #1: (from my in-laws, made by me)
I had explicitly bought The Happy Couple set for my brother's wedding cards. Isn't the script gorgeous on the sentiment?
Card #2: (from hubby and I)
This time I wanted to play a bit with Love Doily, another set I had bought on a whim. I used red and silver embossing powder backed into white, black and red papers. The script background is another
retired Level 2 paper set that I couldn't remember what it was for. The orchid peeking out in the middle is from Quick Cards - Island Greetings.
And of course, like always I brought both the image and the color I used inside the card. The Congratulations sentiment is from Now and Forever.
Other:
* Solid colored cardstock
CTMH:
* Bliss Level 2 Paper Pack
* Now and Forever Set - retired
* The Happy Couple Set
* Love Doily
* Quick Cards - Island Greetings
* Barn Red Ink
* Outdoor Denim Ink
* Red Rhinestone Adhesive Sparkles
* Opaque Adhesive Pearls
* Red embossing powder - retired
* Silver embossing powder - retired
Congratulations again to my brother and his new wife!
Lake Tahoe was gorgeous and pictures just don't do it justice. The below image is of a "cheap" homemade centerpiece made by my brothers' friends, taken by JT Images. To be honest, I've seen a lot more expensive ones that were purchased, and weren't half as elegant or pretty.
Congratulations to my brother and my sister in law on their marriage, and I wish them many happy days to follow. Of course, you know this merited not one but two cards, as my in-laws wished to also send a gift. I couldn't ask for better inlaws. I can't remember the inspiration for either one, unfortunately, but if you recognize the layout - let me know!
Card #1: (from my in-laws, made by me)
I still had some Bliss Level 2 kicking around which I had used back in the day for my wedding scrapbook album (which is still in progress after 6 years of marriage!!) and thought it would be appropriate. I paired that with one of the Quick Card stamp sets - Japanese Blossom.
I had explicitly bought The Happy Couple set for my brother's wedding cards. Isn't the script gorgeous on the sentiment?
Card #2: (from hubby and I)
retired Level 2 paper set that I couldn't remember what it was for. The orchid peeking out in the middle is from Quick Cards - Island Greetings.
And of course, like always I brought both the image and the color I used inside the card. The Congratulations sentiment is from Now and Forever.
Other:
* Solid colored cardstock
CTMH:
* Bliss Level 2 Paper Pack
* Now and Forever Set - retired
* The Happy Couple Set
* Love Doily
* Quick Cards - Island Greetings
* Barn Red Ink
* Outdoor Denim Ink
* Red Rhinestone Adhesive Sparkles
* Opaque Adhesive Pearls
* Red embossing powder - retired
* Silver embossing powder - retired
Congratulations again to my brother and his new wife!
Sunday, July 27, 2014
Rush Hour Wedding Card...
Nobody said I was smart when I backed a BBQ, a card workshop, a post-wedding celebration, and iftaar party back to back in two days. But I did realize very quickly that I didn't have a card for the happily married couple!
In an hour I came up with this inspired by a pin off my Pinterest - Case Study 157 by Jean Martin.
And on the inside I continued the color scheme and flower, the sentiment from yet another Campaign - You Are My Happy.
Other:
* Ivory cardstock
* Copic markers
CTMH:
* You Are My Happy - Sentiments *retired
* Happy Valentine's * retired
* The Happy Couple
* For Always Level 2 Paper Pack
* Barn Red Ink
* Cocoa Ink
* Grey and Black Adhesive Epoxy Bubbles
Hope you are enjoying summer!
In an hour I came up with this inspired by a pin off my Pinterest - Case Study 157 by Jean Martin.
The set itself is a really old SOTM from CTMH but I love how the marks make it really easy to shade the flowers in. Copics used: R24, R29, R22, BG75,YG67, YG63. I paired this with Grey Adhesive Epoxy bubbles.
And on the inside I continued the color scheme and flower, the sentiment from yet another Campaign - You Are My Happy.
Other:
* Ivory cardstock
* Copic markers
CTMH:
* You Are My Happy - Sentiments *retired
* Happy Valentine's * retired
* The Happy Couple
* For Always Level 2 Paper Pack
* Barn Red Ink
* Cocoa Ink
* Grey and Black Adhesive Epoxy Bubbles
Hope you are enjoying summer!
Tuesday, July 22, 2014
Baby's One Year Party...
I was flipping through cards on PInterest when this particular technique of having text on cardstock resisting ink came across my eye. Then I just had to do it.
Today's Inspiration: http://myscrapbasket.blogspot.fr/2014/05/color-q-challenge-240-and-simon-says.html
To get the funky pattern on the smaller unicorn, I first inked the stamp, then used one of CTMH's embossing folios and stamped right on it to get a fancy pattern. Just stumbled upon this unique technique that was inspired by the "kissing stamp" techniques.
Other
* Cream Cardstock
CTMH:
* Stella Level 2 Paper Pack
* Unicorn Dreams
* Love Life
* Joyful Birthday
* Gypsy Ink
* Tulip Ink
* Amethyst Ink
* Cotton Candy Ink
* Blush Ink
* Smoothie Ink
* Clear Detail Embossing Powder
Hope you are enjoying summer! I have a few more cards that I have yet to post.
Today's Inspiration: http://myscrapbasket.blogspot.fr/2014/05/color-q-challenge-240-and-simon-says.html
To get the funky pattern on the smaller unicorn, I first inked the stamp, then used one of CTMH's embossing folios and stamped right on it to get a fancy pattern. Just stumbled upon this unique technique that was inspired by the "kissing stamp" techniques.
Other
* Cream Cardstock
CTMH:
* Stella Level 2 Paper Pack
* Unicorn Dreams
* Love Life
* Joyful Birthday
* Gypsy Ink
* Tulip Ink
* Amethyst Ink
* Cotton Candy Ink
* Blush Ink
* Smoothie Ink
* Clear Detail Embossing Powder
Hope you are enjoying summer! I have a few more cards that I have yet to post.
Monday, June 30, 2014
Happy (belated) Mother's Day...
Only a day late in getting this to her, but she always appreciates the results. We cooked a very nice 3 course dinner for Mom which included an appetizer of scallops with a side of asparagus, a main of lamb and riced cauliflower, and a funky diy dessert of cut up fruit, honey and rice paper wrappers where you could wrap your own "salad rolls".
It was a hit. Inspiration for her card was from here: Case Study 185 : Catherine Pooler
I apologize for the lack of editing on photos - my life has been absolutely crazy lately. I used paper piecing and masking on this card: I first stamped the orchids on the original cardstock, then I stamped again and cut out 3 other orchids that if you look closely you can see it. The center orchid and stem is raised up on this card. I also used Copics to color in the orchid.
The masking was to protect the Smoothie border from being stamped on.
There was more masking to do to protect the same border on the inside. I tilted the stamp so that there were no words from the stamp set showing.
Other:
* Cream cardstock
CTMH
* Eclectic Edges
* Island Greetings
* Mother's Day
* Ruby Ink
* Smoothie Ink
* Gypsy Ink
Hope you are enjoying the beautiful sunshine today!
It was a hit. Inspiration for her card was from here: Case Study 185 : Catherine Pooler
I apologize for the lack of editing on photos - my life has been absolutely crazy lately. I used paper piecing and masking on this card: I first stamped the orchids on the original cardstock, then I stamped again and cut out 3 other orchids that if you look closely you can see it. The center orchid and stem is raised up on this card. I also used Copics to color in the orchid.
The masking was to protect the Smoothie border from being stamped on.
There was more masking to do to protect the same border on the inside. I tilted the stamp so that there were no words from the stamp set showing.
Other:
* Cream cardstock
CTMH
* Eclectic Edges
* Island Greetings
* Mother's Day
* Ruby Ink
* Smoothie Ink
* Gypsy Ink
Hope you are enjoying the beautiful sunshine today!
Subscribe to:
Posts (Atom)