Showing posts with label you and me. Show all posts

Wednesday, March 27, 2013

When you don't have time...

... you make the time.

I'm still trying to get my Easter project for my office completed by tomorrow morning. So my pre-cut 3-D shape pieces, paper trimmer, and glue gun have been living under my desk for the last four hours in hopes that I will be gluing it all together during the lunch hour.

Today's card was inspired some time ago by Random Acts of Creativity but I can't remember the exact card.


Happy birthday to my father-in-law! I admit sheepishly that yes, today is his birthday and I haven't yet sent the card, but he snowbirds in South Africa over the winter months so I still have to find out where to send it to. I pulled out some random embellishments from CTMH that I have been saving for a little while and cut out a shape from Art Philosophy's cart in different sizes for the top of the card. I distressed the edges of the sentiment in Olive and created a bowtie by tying a knot in CTMH ribbon and then cutting the ends.


I brought in the stamping under the bowtie to the inside of this card as well. Can you recognize the paper? If you guessed Stella, you're right - I would have never thought to use Stella in a male card.

Other:
* Solid cardstock

CTMH:
* Ribbon
* Stella Level 2 Paper Pack (retired)
* Dreamin Level 2 Paper Pack (retired)
* Opaque Pearl Adhesives, Mocha
* Random CTMH embellishment
* Art Philosophy Cricut Cartridge
* You and Me (retired)
* Love Life
* Olive Ink
* Chocolate Ink

Happy Easter everyone! With luck I'll be able to get the Easter project up in the next few days.

Monday, February 13, 2012

Happy Valentine's Day!

The stores always start prepping for this way back in January, and the cards are always pink in color and can be seen from across the room. I thought I'd do up a Valentine's card for my husband; honestly, without him I wouldn't be who I was today and secondly I'd leave the house without my head attached!

Happy Valentine's Day to everyone - because you all deserve to feel special!

Today's inspiration is from i{heart}2stamp : Feburary Sketch For You To Try 2012. Of course, the additional die cut behind the circle is a trick I borrowed from Random Acts of Creativity : Feburary SFYTT


Look closely as I interpreted the three circles differently and put three little hearts, with bling at the top of the card. At first I wanted to pick all masculine colors, but pink and red are of course Valentine colors! Oh well, the yellow and orange balances it out, I think.


On top of everything else, my husband is not only my best friend but my soul mate, and so I thought these particular sentiments from the set Soul Mates was just perfect. I always like to keep the colors from the front of the card and bring them to the inside so that the card has a unified look.

Michaels, etc:
* Ribbon
* Yellow patterned cardstock
* Brown solid cardstock

CTMH:
* Soul Mates
* Childhood Portrait
* Grace Level 2 Paper Pack
* Itty Bitty Rhinestones
* Clear Sparkles Rhinestones
* You and Me diecut
* Chocolate Ink
* Smoothie Ink
* Olive Ink

Hope you have a great Valentine's,


Saturday, November 12, 2011

Ryan's Well - Charitable Contribution

In discussion last week a friend of mine was wondering if I could donate my time and some handmade goods. She is championing the cause of Ryan's Well, and was I interested in donating my time and some cards for her to sell towards raising funds for this? Of course.

For those of you who are not familiar with Ryan's Well, it all started with a 7 year old boy who was moved to help those who did not have access to clean water to drink. He got to work and soon had the first well built in 1999 at a school in a Ugandan village. To this day, his foundation continues to bring clean water and sanitation to those impacted by the global water and sanitation crisis. Can you imagine  not having clean water? It's one of the most basic necessities of life. To learn more, click on http://www.ryanswell.ca/

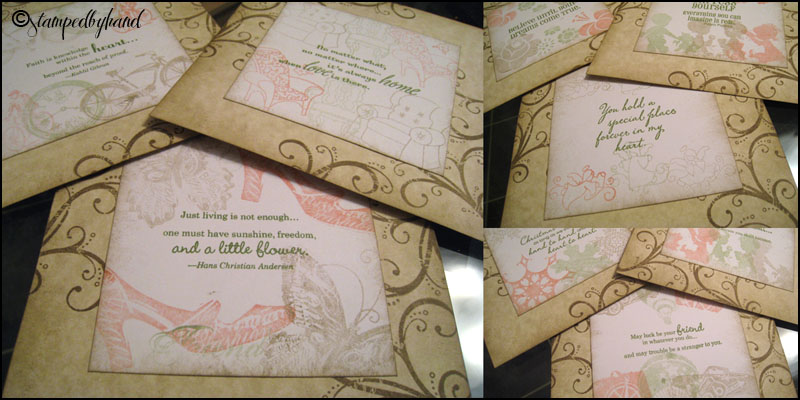
So, I will be having her over tomorrow for a day of gossiping, laughter, homemade pizza and wine along with creating 10 sets of four handmade Christmas cards for sale. They are below:

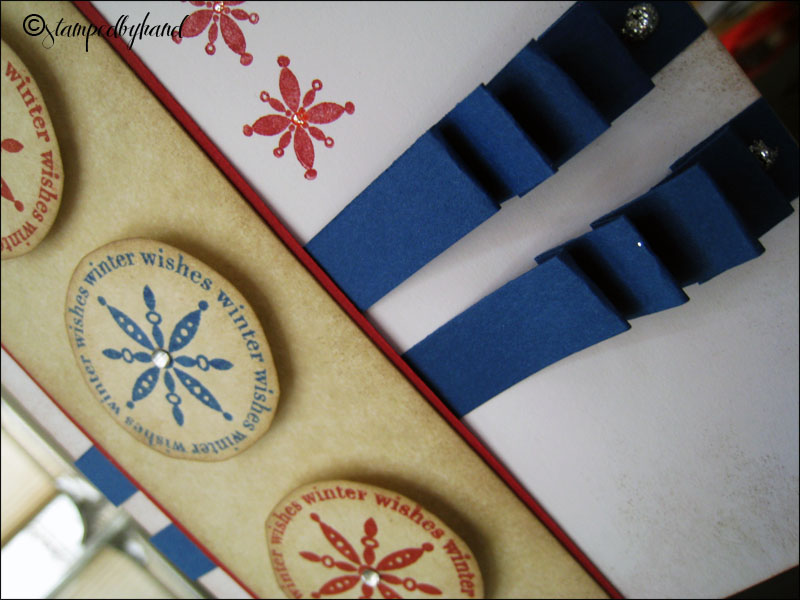
The left photo is how they will look before going into a Ziploc bag and the right is all the cards that make up a set. Thanks to the following blogs and sketches for inspiration: SplitcoastStampers.com : VLVNov2011; Random Acts of Creativity : Challenge #36; Heart 2 Heart Close To My Heart Challenge Blog : H2H76; and finally, Mojo Monday : MOJO 214


I elected to keep this one simple using the layout from  Heart 2 Heart Close To My Heart Challenge Blog. The technique featured here is paper ribbons; I fold them to get a neat accordion effect and I put a dollop of CTMH's silver sparkle gel to make it look like brads. The circles are raised up and I added a rhinestone to the middle of each. CTMH's Art Philosophy cartridge has a corresponding shape to the circles from the set December 25, but I'm hoping for a Cricut for Xmas and thus they were hand-cut.


The biggest challenge for me was to keep it to cardstock and stamps. It was a self imposed challenge to see if I could break away from the dependency on pattern cardstock. I wanted to showcase the different layers here, and the blue border was punched with a EK snowflake edger punch from Michael's. This one was from Random Acts of Creativity 's template, but instead of a big bow I opted for a tiny green tie.


I dressed up the red piece with a Merry Christmas sentiment. Using the layout from Mojo Monday - MOJO214 instead of a flower I stacked three different ornaments from the set Holiday Cheer.with mounting foam tape. It's a bit slimmer than the usual foam squares. And finally, to highlight the snow I used Liquid Applique to outline the roofs and snow in the trees, then embossed it for a poofy look.


This last one from SplitcoastStampers.com highlights one of the major perks about working with acrylic stamps: you can bend them (but be gentle!) to follow curves and other funky shapes depending on what you're stamping on. I again lifted up the three ornaments from the set December 25 and curved the love-hope-peace sentiment from Snow Flurries. The blue snowflake that was cut out again by hand is better done with the corresponding shape in the Art Philosophy Cartridge.

I hope these four cards are charming enough to bring in some $$ for Ryan's Well - wish my friend luck!

Michaels:
* Mounting foam tape
* Cardstock from 'Spice Market'
* Cardstock from 'Gems'
* Cardstock from 'Primary"
* Rhinestones

CTMH:
* Snowflakes
* You and Me
* A Sip
* Pair A Phrase
* Festive Thoughts
* Holiday Cheer
* Snow Days
* December 25th
* Snow Flurries
* Silver Glitter Gel
* Liquid Applique
* Chocolate Ink
* Cranberry Ink
* Moonstruck Ink
* Ponderosa Pine Ink
* Olive Ink


Sunday, November 6, 2011

You and Me Themed 2012 Calendar

This was a unique challenge for me. I wanted to stay solely with the colors that were in the You and Me Kit: Creme Brulee, Olive, Smoothie, Garden Green, and Chocolate which meant that I did not have free reign with colors like I normally have. However, I didn't mind; it was actually less stressful to work with four colors (I did not end up purchasing the Creme Brulee ink) and it came out looking fantastic.


As you can see I ended up using You and Me patterned cardstock for the front and back only. The rest of the inside pages were the brownish/cream colored cardstock from Michael's Spice Market cardstock and the quote pages were white cardstock that I distressed with chocolate ink.


Each of the stamped corners on both sides were done with the curly stamp from You and Me, three times per corner and then all squares were distressed with chocolate ink. I thought it would be lovely to have a little quotation on the back of each square. Each quotation is matched with some "pictures" of course, all second generation stamping. In the case of September and December, the months actually span over six weeks so I needed to do some masking in order to stretch the weeks.

I wish I could keep this calendar for myself as it came out looking so gorgeous but it is a present that I'm sure my Mom will love this year for Christmas. I am glad that this project is done - I can finally put all my stuff away properly :) but no shortage of stamp sets were used.

All in all this being my first time, I will definetly use the My Creations chipboard items again. Next time I will be using their triangle banner.

Michaels:
* Cardstock from 'Spice Market' set

CTMH:
* You and Me Kit
* Creme Brulee, Smoothie, Olive, Garden Green cardstock from Autumn set
* Bohemian Alphabet
* Classmate Alphabet
* Month By Month
* Enjoy Life
* Find Your Style - Jan 2011 Stamp of the Month
* Horizons
* Chairs To You - April 2011 Stamp of the Month
* Pair-A-Phrase - August Constant Campaign
* Angel Sent
* Sensational Season - March 2011 Stamp of the Month
* Wings Workshop kit stamp - retired
* Dreams Come True
* Baby Love
* Snowflakes
* Wonderful Friend - retired
* Olive Ink
* Chocolate Ink
* Garden Green Ink
* Sorbet Ink

Saturday, October 8, 2011

Elves, elves, elves...

Interesting bit of trivia for you: in Denmark, elves are known as nissers, and they are generally planted in weird places around the house for guests to find. I was at a CTMH Christmas workshop years past where I cut out and colored enough of these little guys (stamped from the set Merry Pursuits) for probably 25 cards, 3 nissers per card. I never did finish them but I kept all the nissers just in case.

Today's inspiration comes from Got Sketch? : Sketch 129. 


When I saw the three triangles on the sketch, I knew instantly what I wanted to do - hourglasses! And I had the perfect set - so all I did was stamp out six triangles, glue them on, and add rhinestone sparkles. Remember those forgotten nissers? One of them made his way onto this card!


At the same workshop, my eyes lighted on a beautiful snowman card. I was warned by the consultant that it was a 3 hour card, but I didn't care; I had to make it. So, I did (and yes, 3 hours later) and then bought the same stamp set (All Decked Out) if I felt like doing it again at home. I haven't used the set since, but I thought he'd be a fun little friend for the inside.

Michaels:
* Cardstock
* Fiskars Border Punch
* Rhinestones

CTMH:
* Winter Memories
*  Merry Pursuits
* You And Me (retired)
* Festive Thoughts
* All Decked Out
* Wonderland Paper Pack Level 2
* Spring Iris Ink
* Moonstruck Ink
* Chocolate Ink
* Desert Sand Ink
* Ponderosa Pine Ink Pen
* Moonstruck Ink Pen
* Barn Red Ink Pen

Remember I promised to post the remainder of my Halloween project? Well, look for them - I may add the occasional item from those cube decorations onto the end of blog posts. They are now up and my boss really liked them!


The inspiration for the hand-drawn tree is from paper donated to me by a Creative Memories consultant. I didn't want to use the paper as it was too dark, but I definetly wanted a tree peeking out from behind the fence.

Michaels:
* Cardstock - Gems and Spice Market collection
* Rhinestones
* Brads

CTMH:
* Wicked (August Stamp of the Month)
* You And Me
* Outdoor Denim Ink
* Chocolate Ink

Happy Thanksgiving!

Saturday, September 17, 2011

Believe enough to heal...

A close relative of mine found out that the cancer he beat successfully 9 years ago has made a return, to the dismay of his family and of course, myself.

I'd like to send a card as he took the time to come to both of my wedding celebrations over 3 years ago. Nothing like a homemade card to bolster the positive thoughts that they are holding to in order to get through each day. And the rest of us are hoping that he will be successful in beating the disease the second time around.

Today's inspiration is another one of Got Sketch?'s designs, Sketch 128


I didn't want to use a huge big flower but given that Hope is such an important concept for cancer survivors whether they have battled or are still battling, that the Hope For Japan set was a good choice instead. My color scheme was based on fall with bright, sunny colors. The inside uses the Angels set; sometimes healing is nothing short of a miracle.


Although I felt the message both on the outside and inside were a bit mixed, it still means that they should believe in the fact they will have the strength to beat this monster.

Michaels:
- Cardstock
- Fiskars border punch
- Rhinestones

Dollar Store:
- Ribbons

CTMH:
- You and Me set (retired)
- Dreams Come True
- Angel Sent
- Chocolate Ink
- Outdoor Denim
- Desert Sand
- Ponderosa Pine

Saturday, September 10, 2011

Looking for that special project...

When I first started with CTMH back in May, my consultant's welcome package included the You and Me kit with a stamp set, die cuts, and paper. As this set was also being used to fundraise for all the catastrophes on the other side of the border in the US I was just waiting for that "special" project that I thought would be fitting.

I am now in the process of starting Christmas cards and some homemade Christmas presents. As it were, my Mom lives vicariously through me, as her mother was a crafty lady and she doesn't have the patience or head for it. I thought she'd like a homemade calendar; and then it came to me that this was the You and Me project I was waiting on. I have only gotten as far as the front cover.


I have to pick up a few more items to start the inside including a stamp block, possibly some paper from Michaels, and the Autumn paper pack from CTMH. I will be using the Month By Month stamp. When I am done I will post a sneak peek of the inside.

As well I did finish my Halloween project, but you will have to wait until October for panels 3-9. My cube will be the envy of my cubemates.

Cardstock:
* Michaels

CTMH:
* You and Me Kit (stamp set, die cuts, opaque adhesive pearls) - retired
* Bohemian Alphabet
* Love Petite Perks set - retired
* My Creations™ Display Album
* Chocolate Ink
* Smoothie Ink
* Olive Ink
* Garden Green Ink


Thursday, August 25, 2011

Liquid Applique and Christmas

One thing I have not used much of is Liquid Applique (Z308) in the catalogue. I was introduced to this stuff during my first Christmas card workshop and it is fun to play with. It goes on a lot like a white gel, then you let it sit for a number of moments to dry. Lastly take your embossing gun to it and it poofs up just like snow.

I find this to be a neat texture addition to Christmas cards, but don't let your imagination stop there. :)

Today's inspiration comes again from Mojo Monday: MOJO205


Another technique I wanted to point out is how to stick those ribbons on the cardstock. Instead of using a ton of ribbon and tying all the way around, you can just easily tape the ends of the ribbon on the back of the cardstock, saving you some lengths of it :) As well, to attach the silver bow I used a tiny brad to anchor everything.

Cardstock:
* CM
* Local craft stores

Embellishments
* Dollar store finds

CTMH
* Festive Thoughts
* Snow Flurries
* Merry Pursuits
* You and Me
* Spring Iris Ink
* Moonstruck Ink

Saturday, August 20, 2011

Haircut leads to more good news

My hairdresser, which I found after several years of failed haircuts (dry, damaged, and generally looked awful) has been making me absolutely gorgeous for the last 5 years. I see him once every four to six months, and although he has total creative license over my hair he always listens to what I have to say.

The man is a genius with scissors.

He told me today, while his scissors was doing it's thing, that he was expecting a little one! Well I just couldn't resist - and out came the stamps. Playing in Mojo Monday's latest challenge, MOJO204 this was the end result:


Thanks Mojo Monday for coming up with such fantastic layouts!

Cardstock:
* Michaels Craft Store

CTMH
* Baby Love
* You And Me set (June fundraiser, retired)
* Chocolate Ink
* Smokey Plum Ink
* Ponderosa Pine Ink
* Itty Bitty Sparkles Rhinestones

Thursday, August 11, 2011

Decoration #2

In the spirit of Wicked, August's stamp of the month I came up with another cube decoration square. This time I decided to use two new elements of the set - the hat, and the kitty.


Pardon the poor lighting; the orange is the same as the first square.

I also love embossing things, and this time I thought I would try out the new embossing powders (black for Halloween) that I just picked up from CTMH. I have resisted it for a long time, because I own some silver, gold, and clear sparkly stuff from when my grandma was still alive. She was the most amazing crafter I have ever met, and I miss her - and she was always willing to indulge me in whatever craft obsession I had.

Amazing stuff, I tell you. The photo doesn't show it but I embossed the curly background on the bottom and the top left square with the black powder.

Cardstock
* Michael's Craft Store

Embossing ink from my own stash

CTMH
* Black embossing powder
* Corner Rounder
* Bohemian alphabet set
* You and Me set (June fundraiser)
* Wicked set
* Outdoor Denim Ink
* Cranberry Ink

Saturday, July 16, 2011

Fun Birthday Times

My husband's Grandmother is turning 80 and having a huge celebration in Denmark. She asked us to be there, but unfortunately we cannot go due to planning obstacles. So, instead I decided to make her a fun and feisty card. I think this is the loudest card I have ever done, but it also is supposed to show that when you're 80 you can do whatever you want.

Today's card is inspired by Got Sketch: Sketch 122

Here's my take on it:


Cardstock:
* Local finds

Tools:
* Provocraft Edging scissors
* CM Limited Edition Butterfly Pocket Punch (retired)
* Fiskars Border Punch

CTMH:
* Card Chatter
* Bohemian Alphabet
* You and Me
* Spring Iris Ink
* Tulip Ink

Remember, if you are a new follower (drop me a comment if you are!) or order this month you can enter to win one of four Petite Perks Love stamp.

Saturday, June 25, 2011

Four squares and one Inspiration

I'm really enjoying playing with all these scrapbook challenges. It actually gives me a reason to get further and further ahead with my wedding scrapbook, and everyone each time submits such amazing samples. Sketches in Thyme has one last challenge for the month of June, and it's an open one!

Today's inspiration is from PageMaps. It is the very first one on their June 2011 Pagemaps post.


Cardstock:
* Creative Memories
* Local craft stores

Embellishments:
* Vellum Quote: Creative Memories
* Embossing powder: my stash

CTMH:
* You and Me (June promotion... only a few days left!)
* Bliss (Bliss Workshop Kit, G1020)
* Kraft Color Ready Borders (Z1377)
* Cranberry Ink (Z2116)
* Desert Sand Ink (Z118)
* Versamark Ink

Monday, June 20, 2011

Scalloped Borders

I really loved the scallop border on the second sketch from Sketches In Thyme, so much that I thought it would be an excellent partner to the one showcased in "I love circles".

This time I didn't need to use dinner plates :) but I certainly got to try out some of the newest brads that resemble buttons from CTMH. I love them!

Today's inspiration is Sketches in Thyme Thursday Takes #50


I'm still a bit new at taking photos of layouts ... any advice would be appreciated!

Cardstock:
* Local craft stores

CTMH:
* You and Me (June promotion)
* Soul Mates (D1254)
* Mini Medley Accent Collections, Black (Z1393)
* Chocolate Ink
* Sorbet Ink
* Garnet Ink

Sunday, June 19, 2011

Cute and Simple

I saw this template in Wishes and was inspired to try it out. It's a tiny little 3x3 card but sometimes the smallest things are the most precious. On the inside, it says 'Father's Day' as the Happy in my 'A Little Everything' set was too big! Today's idea is inspired by Heart 2 Heart's latest challenge, background stamping.


I'm not sure which one of my Dads (my FIL or my Dad) will get this, but next year they will :)

Cardstock:
* Local craft stores

CTMH:
* You and Me (June promotion)
* Enjoy Life (C1439)
* Spring 2011 Petite Perks
* Chocolate Ink (Z2111)
* Olive Ink (Z2137)

Wednesday, June 15, 2011

I love circles.

To me anything but squares are a challenge. I can cut smaller circles with a Fiskars Shape cutter but anything large, like this particular layout requires some innovative thinking.

Today's inspiration for my wedding album (yes, a scrapbook several years in the making now) was Sketches In Thyme Thursday Takes #49.

Two dinner plates, one of them from my bone china collection plus a pencil equated to two almost-perfect circles of the right size.


You'll notice that I used two techniques here: masking and double-inking.

Cardstock:
* Local craft stores

Embellishments:
* Dollar store finds

CTMH
* You & Me (June fundraiser)
* Soul Mates (D1254)
* Smokey Plum Ink (2147)
* Chocolate Ink (Z2111)
* Sorbet Ink (Z2164)

Thursday, June 9, 2011

Sympathy

During one of my meetings at my day job last week it was announced that a mother of a coworker had passed away. My boss was a little uncertain as to what to do, but I thought the very least we could would be to sign a card showing them that we are thinking of them and that we care.

It also highlighted the fact that I don't have a stamp set with Sympathy words on it but I improvised; with some vellum, my printer, and Googling I was able to add some text. Next order I guess...

Using the layout 'Patriotic' from Wishes (9033):


Cardstock:
* Local craft stores

CTMH
* You and Me (June fundraiser)
* Rosy Regards (B1369)
* Bliss (Bliss WOTG - G1020)
* Moonstruck Ink (Z2134)
* Smokey Plum Ink (Z1247)
* Cranberry Ink (Z2116)
* Olive Ink (Z1237)
* Opaques Pearl Adhesive Gems (Z1336)

Friday, June 3, 2011

Storm Survivor Benefit Campaign

The amazing thing I love about CTMH is all the support they give to those in need. On the heels of Hope For Japan's campaign is the You And Me: Stronger Together Storm Survivor Benefit Campaign to help those affected by recent severe weather in the US.


During the month of June, order a You and Me Kit as pictured above for only $16.50 CAD (with a retail value of $38.95) and a portion of the proceeds will be donated to the America Red Cross 2011 Floods and Tornadoes relief operations. This will be available until June 30, 11:59 MDT or until supplies run out.

This photo I took of the kit shows the stamp set in greater detail. It's a gorgeous stamp set and usable for all sorts of occasions.

Monday, May 30, 2011

I can never resist a neat tutorial...

I stumbled onto this tutorial while surfing the web for more card related items. Or rather, link hopping through various blogs. I also happen to have a love for origami that dates back to my teenage years. So, by mixing origami and card making you get... something I just absolutely had to try.

The Diamond Fold Card tutorial is brought to you by Splitcoaststampers

I also had the You & Me Stamp Set and a congraulations card to make. You see, the girl I did the card for is throwing the BBQ for two reasons! Her husband, another university friend of mine passed his Ph.D!

Here's the end result from mixing all that stuff together:


and of course, a side view to show off the folding:


The technique I used on the 'follow your' text is called 2nd generation stamping. It creates a neat shadowy-like effect, and it's achieved by simply stamping again without reloading the ink on your stamp.

Cardstock:
Local craft stores

CTMH:
You & Me Stamp (D1495) - May Promotion
Sorbet Ink (Z2164)
Chocolate Ink (Z2111)

Saturday, May 28, 2011

A new neighbour

I was talking with my neighbour last weekend when it came out that she had welcomed a little boy into the world back in January! We talk when we bump into the backyard but given that weather had to cooperate before that happened, it was May before I found out.

What better occasion than that to create a card?

Today's inspiration is SSC13 from Random Acts of Creativity


The designs for Baby Love (B1368) were so cute I had to use it on the inside, too:


Cardstock & Button Sticker:
Local craft stores

Inside stamp for card:
Oh Baby - local craft store

CTMH:
Wooden Designer Buttons (Z1387)
Natural Hemp (Z280)
A Game Stamp (A1113)
You & Me (D1495) - May Promotion
Enjoy Life (C1439)
Baby Love (B1368)
Moonstruck Ink,
Ponderosa Pine Ink,
Grey Flannel Ink,
Bamboo Ink,
Spring Iris Ink